When I moved into my current place a few years ago there was an in-ground pool in the backyard. It was unheated & had no cover, so I ended up adding a heatpump as well as a safety cover so that it wasn’t a deathtrap for a young child. The cover is ‘automatic’ in the sense that the opening/closing action is electrically operated via a keyed switch, but I always thought it would be an interesting project to try and hook it up to some home automation so I could trigger the open & close without having to physically walk over to the switch and insert the key.
I finally got around to trying this out over the last few weekends & after reverse engineering the input & output electrics for the system & adapting/vibe-coding some previous Raspberry Pi automation projects, I came up with a solution that allows the cover to open & close via a web app or via HomeKit.
My specific pool cover is built by Latham, but I figure its probably a pretty common design for a lot of similar covers. It has 4 3.3v inputs - an input signal for opening the cover, an input for closing the cover (these are mutually exclusive and toggled via a physical key switch) plus two additional magnetic limiter switch inputs for the closed & open positions to prevent the cover over or under extending.
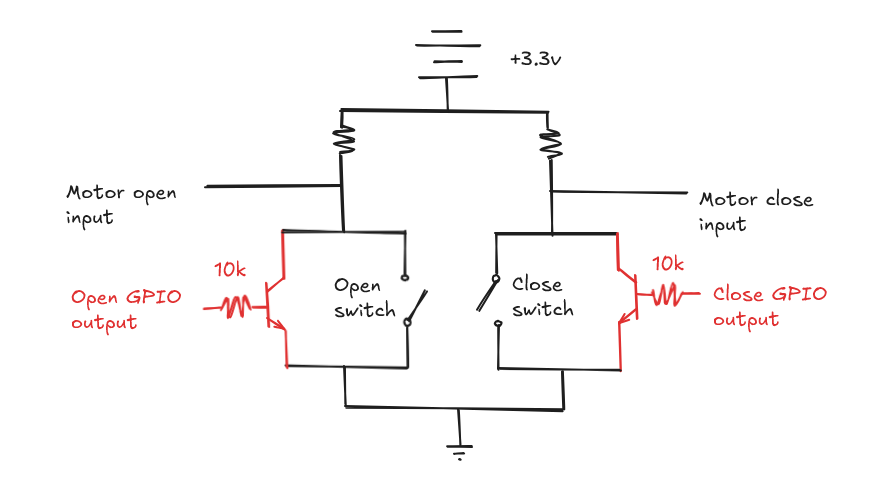
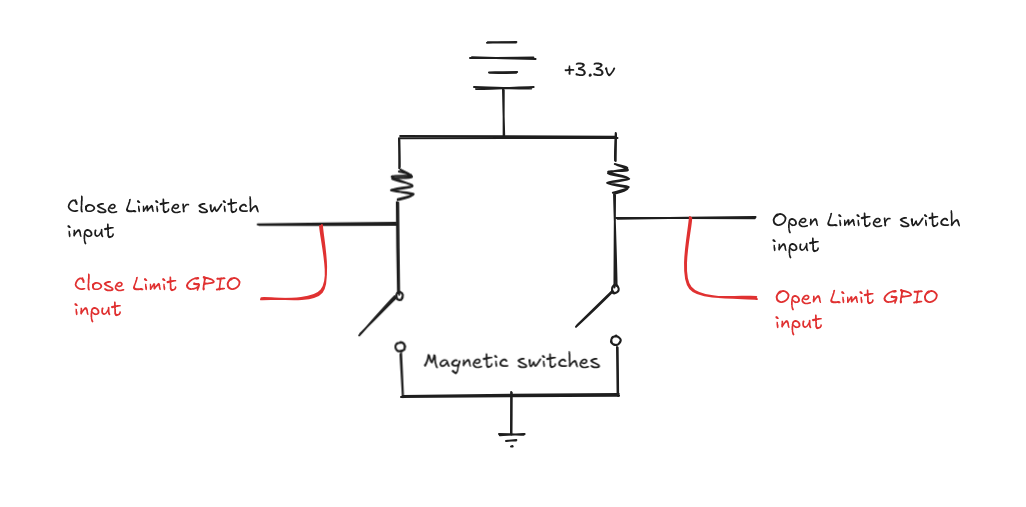
After splicing the wires to the key+limiter switches & fiddling around with a voltmeter while opening & closing things I figured that the actual circuit looks something like the diagrams below (in black) - basically a series of pull-up resistors connected to the pool covers logic board. I then figured that to control this via smart automation I would need to be able to tap into the signals, so I planned some additional modifications (in red), which would hook into the GPIO ports of a Raspberry Pi.
Motor switch circuit
Limit switch circuit
The app
Similar to some previous automation I’ve built - I put together a quick ExpressJS app running on a Raspberry Pi Zero that would control the 4 GPIO ports used to control the pool cover. I’ve posted the Source code on GitHub if you’re interested in building this project or adapting it for some other hardware.
The logic isn’t super complicated, but one interesting part of syncing the state of the physical hardware with the software is that the only way to know the true extent of how open or closed the cover is are the limiter switches at either end. This means that to get an interpolated state as the cover is opening or closing, I needed to add a calibration process which times how long it takes to open and close, and then uses that to estimate the position until the limiter switch gets hit and resyncs the true state.
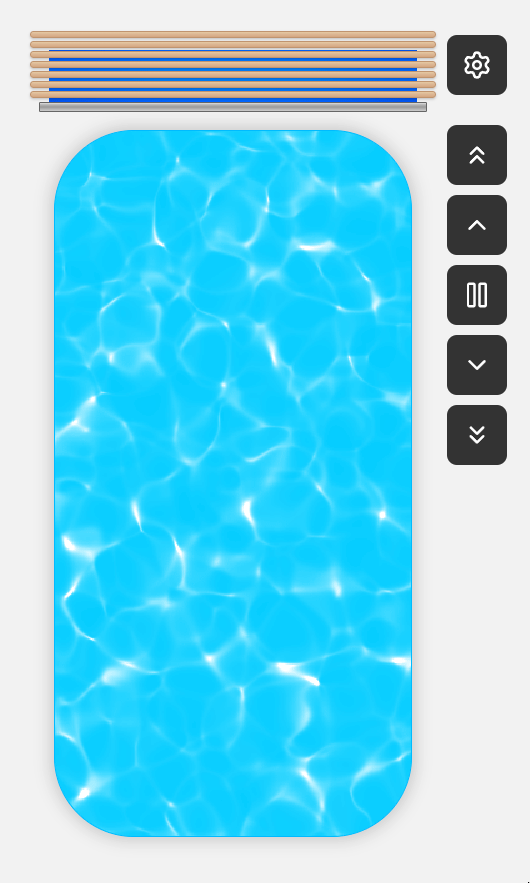
One other interesting item I added to make the physical appearance of the app a bit more engaging was a WebGL caustics simulation to show the pool water. Rather than doing it from scratch, I adapted this one from ShaderToy but with a particular shade of blue.
If you already use Homekit for other home automation, the app also publishes itself as a Homekit compatible door accessory using HAP-NodeJS, so you can control it from Apple Home and hook it into any automation in that ecosystem
Installation
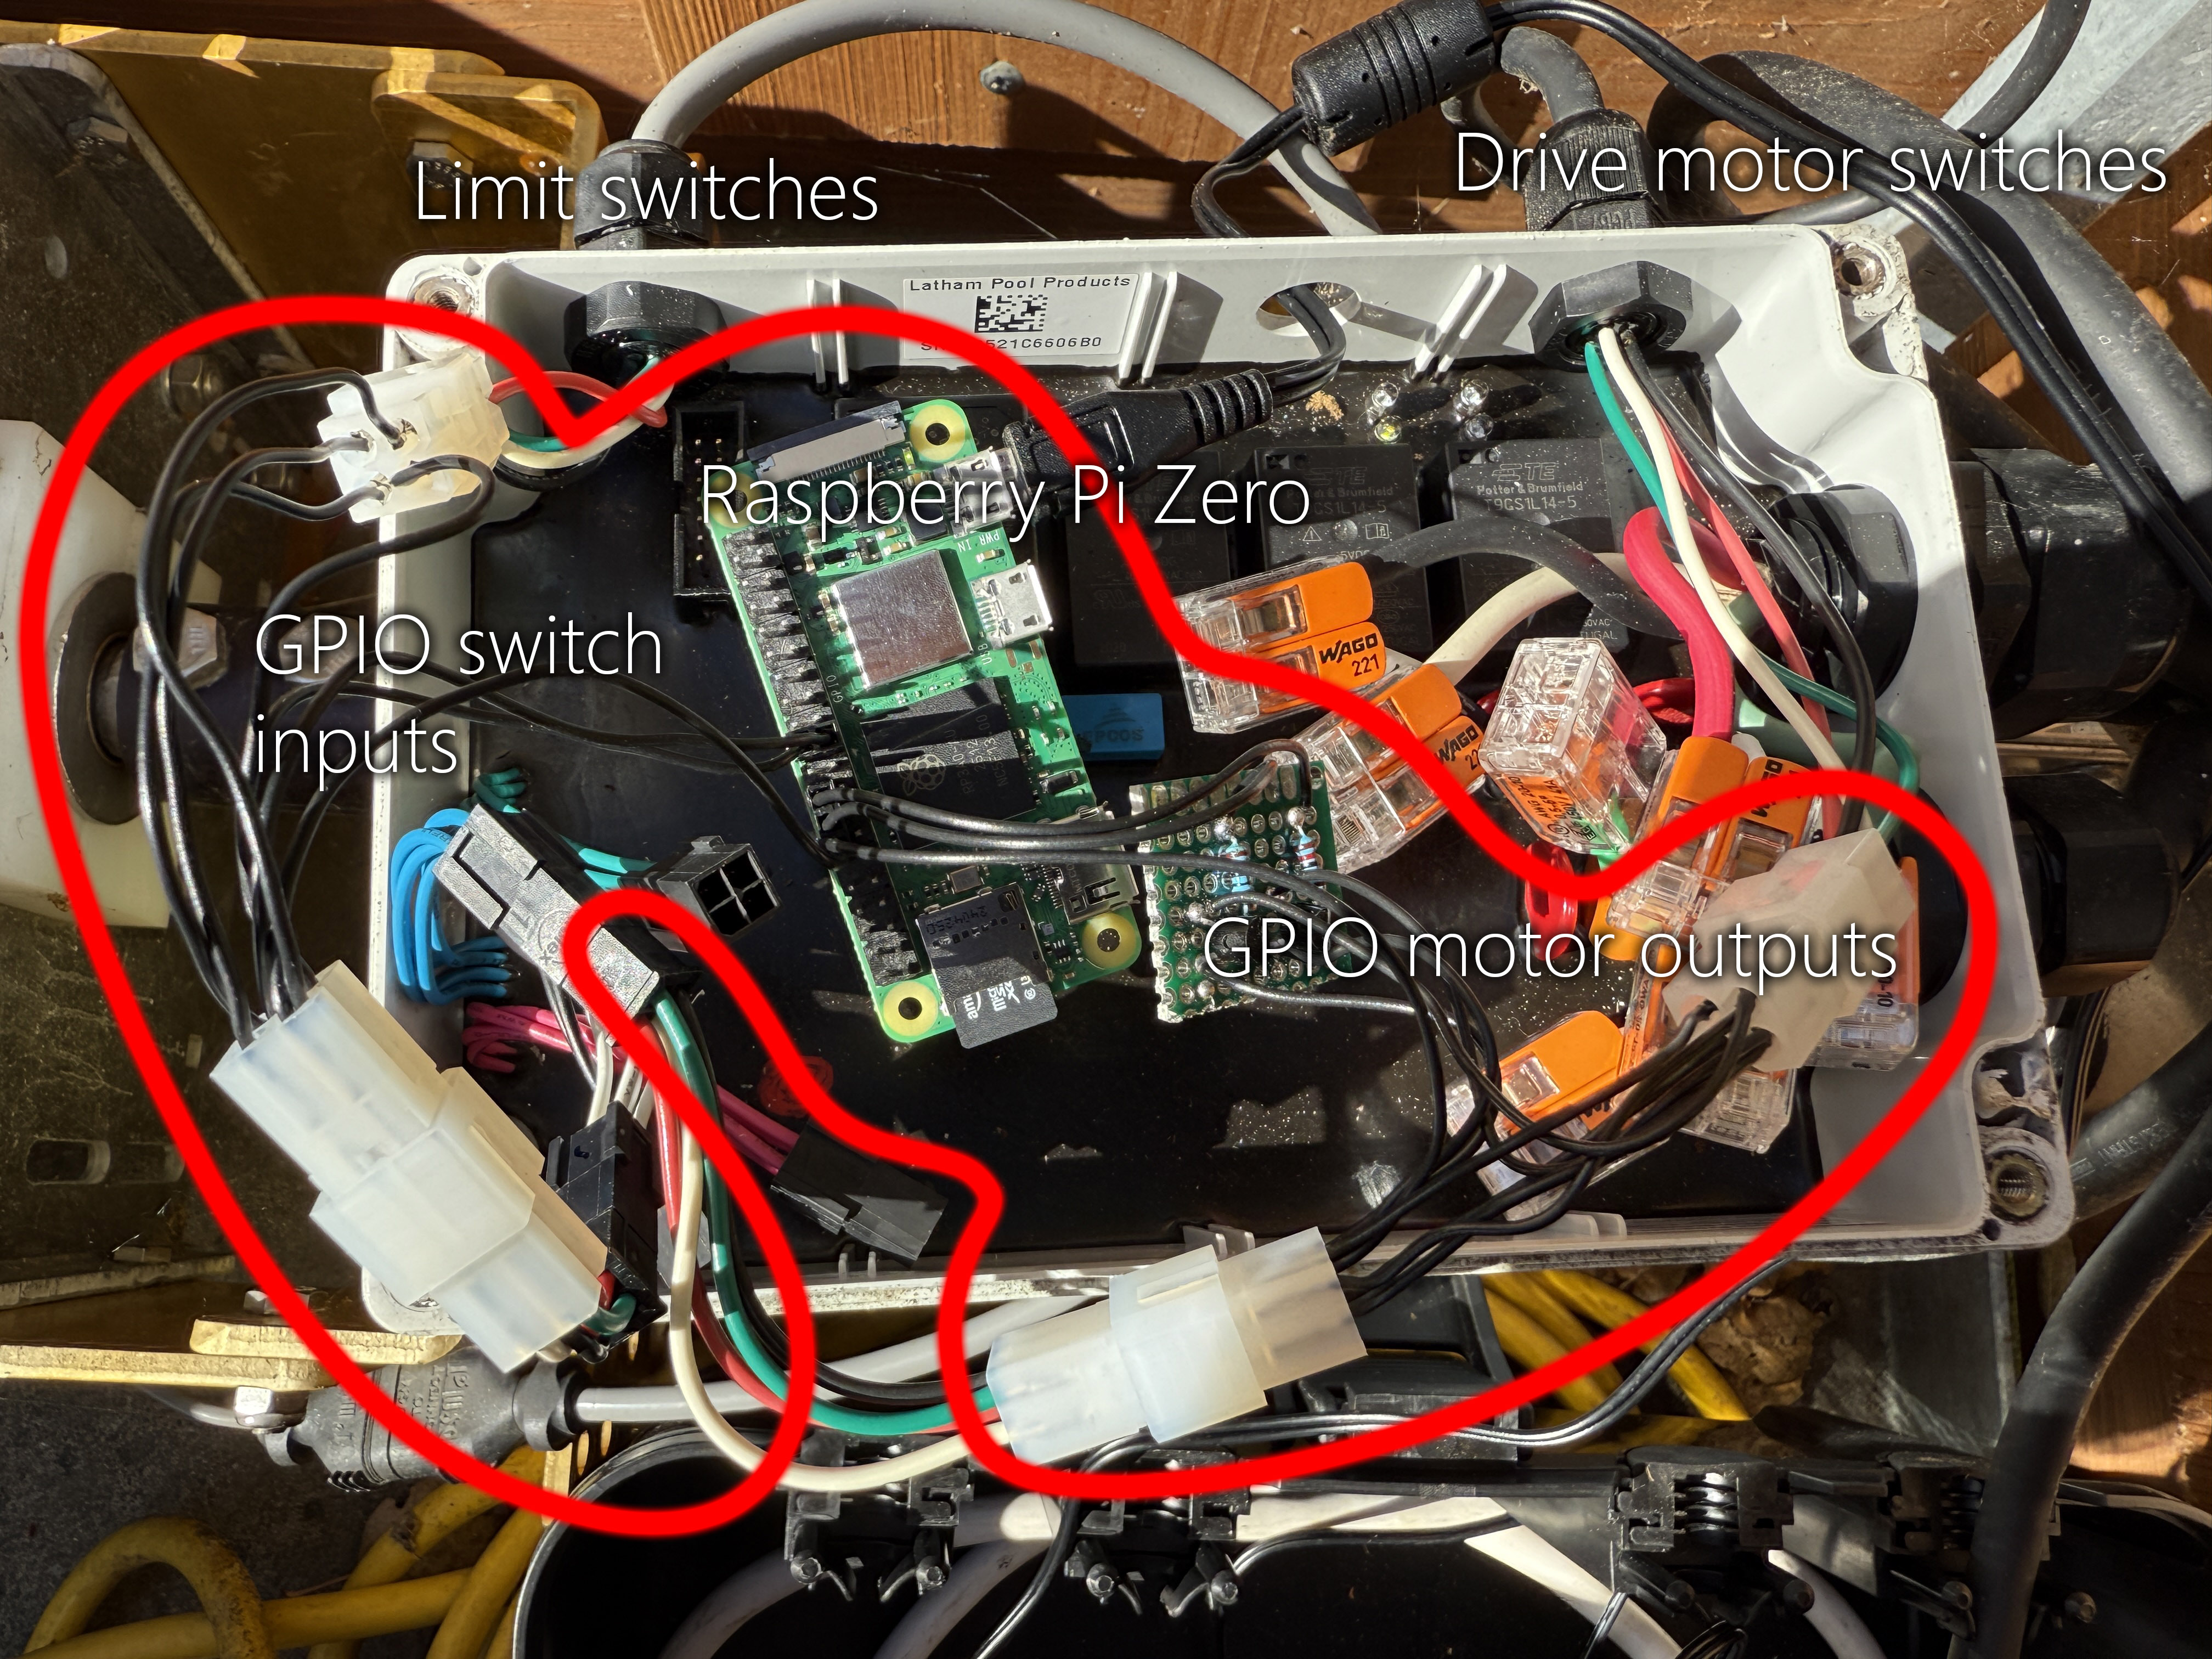
Below is the installation of the Pi on the physical hardware. For both the limit switches and the drive motor switches you can see I’ve spliced the existing wires with some molex connectors so that I can easily remove the automation if necessary. All the automation was already in a waterproof enclosure with plenty of free space - along with a pre-drilled hole for the Pi power cable, so I was able to just jam the Pi & the extra connectors inside without any additional modification.